Learning Objectives
- After this course readers will be able to explain how to assess which version of Noah they are running, and know whether an update is needed.
- After this course readers will be able to explain how to customize Noah to better meet their clinic needs.
- After this course readers will be able to explain how to network Noah so a common database is available to all clinicians in their practice.
Introduction
Noah is estimated to be in use by over 70 percent of hearing care professionals in the United States. Some professionals use Noah extensively for the wide variety of modules available, for its ability to provide patient questionnaires, record measurement findings (e.g., Audiograms, real-ear measures), host chart notes, documents, fitting history, and organize a useful customer database. Others use Noah for select clinic operational needs. This article aims to give new and experienced users alike an update on the current Noah platform and native modules.
Let’s start with information about the background of Noah and how it is ultimately distributed to you, the end user.
History and Background
Noah is developed and supported by the Hearing Instrument Manufacturers’ Software Association (HIMSA). HIMSA was founded in 1993 with the goal of developing a standard for integrated hearing care software (www.audiologyonline.com/expo/himsa). By 1994, the first version of Noah was released. Over the past 21 years the standard has been updated and improved upon with the ultimate goal of simplifying the hearing instrument fitting process (Noah Distributor Reference, Dec. 2014) mostly via the Noah program, but when beneficial via other means, for example the development of the NOAHlink programming interface.
HIMSA’s organization is unique – a privately owned company supported by partner and member companies ranging from audiological equipment manufacturers to hearing instrument manufacturers, and by sales of Noah license fees. HIMSA is a pretty lean company, with about 20 full-time employees. It provides technical and developer support to its member companies, and each of these companies is then responsible for providing Noah product support to you, the end-user. These companies employ support engineers who are able to address your Noah questions as well as issues specific to their Noah modules. You may have noticed that when a Noah upgrade is released, or when technical support is required, you work through your Noah distributor, usually a hearing instrument manufacturer, for support.
If this article opens your eyes to additional functionality for your Noah deployment and you need advanced technical know-how, please contact your Noah distributor company. Before doing so, please review this article and the variety of technical support materials hosted on the HIMSA website.
What is the Current Version of Noah?
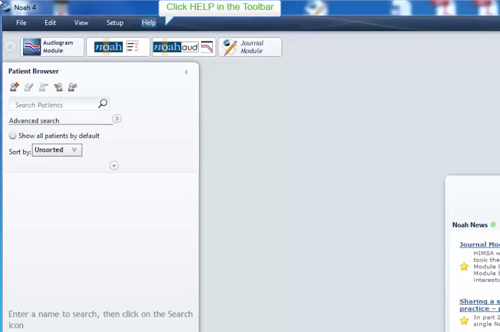
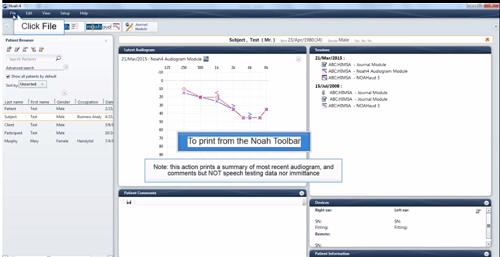
The current Noah version is Noah System 4, first released in April 2011. View Video 1 to learn how to check if your system is up-to-date.
Video 1: Verify Noah Version and Build (click on image to play video)
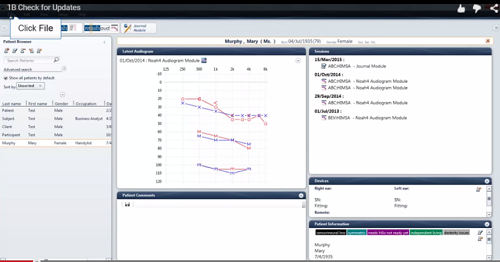
Video 2 shows you how to check for updates, and how to have Noah System 4 alert you about available updates. When using Noah System 4 in a networked environment, the server system and the various connected computers (clients) must all be using the same version in order to communicate. When an update is available, the system prompts guide you through the upgrade so as to avoid any issues. This is usually performed at a good time so as not to affect clinic productivity and all systems are upgraded systematically.
Video 2: Check for Updates (click on image to play video)
If your system is still operating on Noah 3, it is time to upgrade. The upgrade process is simple. First, check which version of Noah 3 you have installed: Open Noah. From there go to the Help menu. Choose About Noah. If you find your version is 3.5.2 or 3.7 the process of installing the new Noah system will automatically migrate all of your settings, patient records, Noah license and Noah modules. More information can be found on the HIMSA website.
It is possible you will also need to update some of your measurement equipment modules (for example, audiometer module), so contact the support team from the relevant companies for guidance before upgrading Noah.
Finally, there may be some very old Noah modules that have been discontinued and are incompatible with Noah System 4. If some of your patients still use hearing aids that rely on these modules, it may be beneficial to maintain one computer with a Noah System 3 installed. For guidance on upgrading from Noah 3, refer to the HIMSA website, or talk to your Noah distributor company if you need technical assistance.
Main Features of NOAH System 4
As an audiologist, I want to focus on the features and capabilities of Noah System 4 that are most valuable to your daily clinical practice. Let’s go through the following, incorporating videos of software simulations as we proceed.
- Main screen
- Customization
- Powerful search functionality
- Sharing your Noah System 4 database among clinic rooms and even separate locations
- Noah System 4 – more than just the hearing aid fitting
- Securing your patient data and protecting your practice
Main Screen
When you open Noah System 4, take note of the Noah News segment that sits in the middle of your main screen (Figure 1). Here you’ll find news, tips and tricks, survey results and more. Regular review of this section will keep you up to date with announcements from HIMSA.
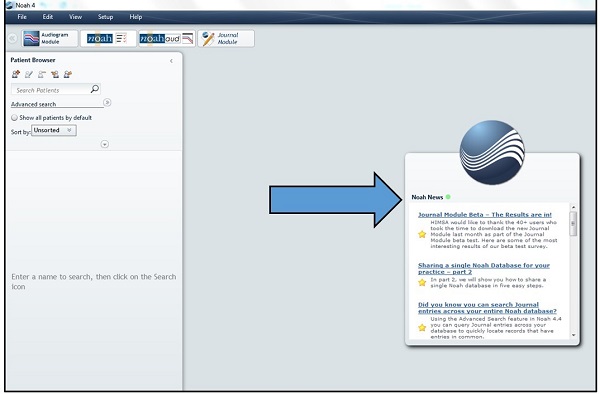
Figure 1. Noah News window on main screen.
On the left side of the main screen is the Patient Browser (Figure 2). Here, depending on your preference, you may show all patients by default or just those that come up on a database search.
Figure 2. Patient browser in Noah 4, checked (left) and unchecked (right).
You may also choose different views using the icons at the bottom left of the screen (Figure 3).
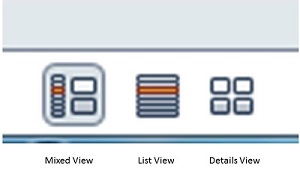
Figure 3. Screen view icons.
Let’s look at our example patient, Mary Murphy (Figure 4). In the Mixed View, we see the Patient Browser on the left. In the mid-section is the Latest Audiogram, below which lies an area for relevant Patient Comments. To the right are the Session List, the Devices section, and the summary of demographic information about your patient – Patient Information.
Figure 4. Example patient in the Mixed View.
The List View is customizable so that we see as much or as little detail from the contact record as needed (Figure 5).
Figure 5. Examples of List View.
In the Details View, the patient browser is collapsed to the left side of the screen leaving more room for current patient details (Figure 6).
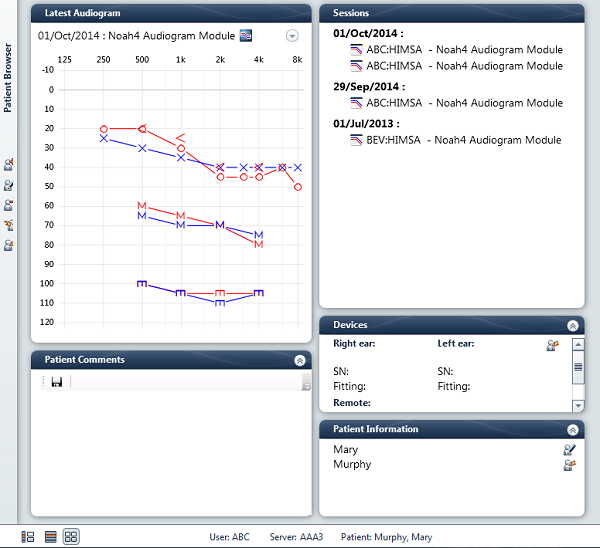
Figure 6. Example of Details View.
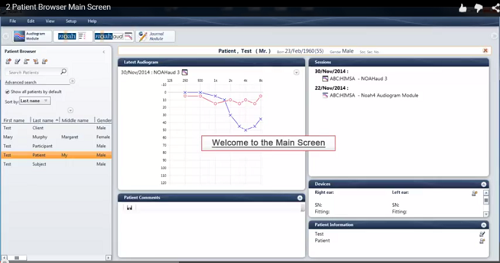
Let’s see the basics of the Patient Browser in simulation mode.
Video 3: Patient Browser Main Screen (click on image to play video)
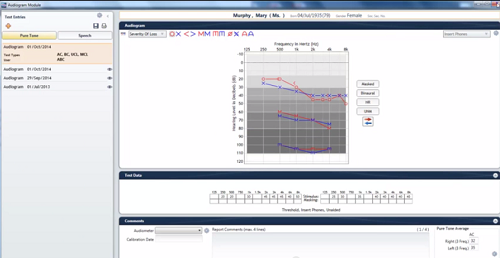
The Latest Audiogram section offers some functionality of which you may not be aware (Figure 7). First, the date, description, and icon in the box lets you know what module created the audiogram. Clicking on the icon launches the module. Next, the arrow to the top right of the audiogram allows you to copy the audiogram, or save an image file for use elsewhere.
Figure 7. Example of Latest Audiogram in the audiogram module.
The Sessions List allows the clinician to hover over any particular entry and obtain more information about the event (Figure 8). All patient-related events are saved in the Sessions List by date. This includes audiograms, hearing aid module events, questionnaires and journal entries. Clicking on a Session List item will launch that event for review or continuation of care. You can see this in Video 4.
Video 4: Patient Browser Session List (click on image to play video)
The Sessions List is a handy summary of the most recent hearing instruments fitted to your patient.

Figure 8. Example of a Sessions List.
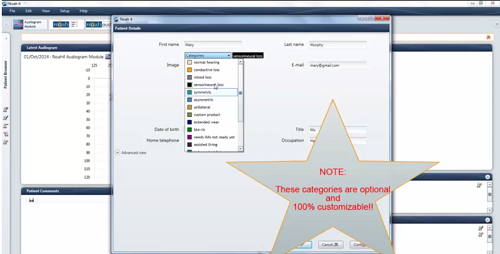
Under Devices lies the patient demographic summary or patient information. Here you may view and edit your patient details, add a photograph of your patient, and assign categories.
Video 5: Patient Browser Patient Information 2 (click on image to play video)
Finally, the Patient Comments section in the bottom-middle of the main screen is a free-text area that may be populated with whatever information you feel is important. Note that it will be visible in the Mixed View or Details View screen, and any text entered will not create an entry in the Session List.
Customization
The Noah System 4 is easily customizable to meet your clinic’s needs.
For those of us who serve patients with older generations of hearing aid technology or multiple manufacturers’ hearing aids, module order may be customized. Go to Setup in the menu at the top of the main screen and select Arrange Module Order. There is no rule or recommendation for how to set this up – it’s a personal preference.
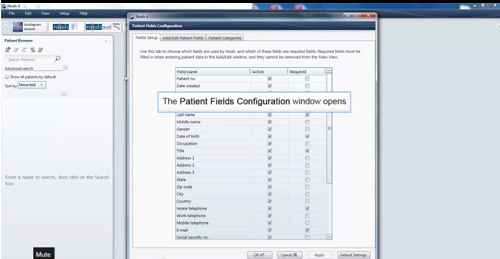
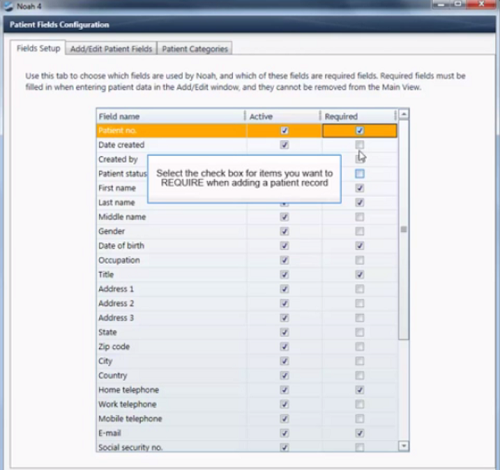
We may also customize which data fields we want to include for our patient demographic information. We can make certain fields required so that a patient record may not be created until that field is populated. I mention this because if Noah System 4 is set up properly it can be used for some powerful data extraction that can help us in our overall patient management or perhaps a specific marketing effort. The results of our data mining will only be useful if we make sure that our database holds the information we need in the places we can pull that information from. There are a couple of ways to enter this area of Noah System 4. Go to Setup, select Administration, and then select Patient Data Setup. Alternatively, go to the Patient Browser, select Add a New Patient, followed by Configure. Watch the following video on configuration.
Video 6: Customization - Configure Patient Fields (click on image to play video)
Your selection of data fields important to your practice will depend on how you use or intend to use Noah System 4. In Video 7 you will see three tabs. For demonstration purposes, in the first tab I make most fields “active” with a subset of these fields “required” when creating a new patient record. We have to balance the need for valuable information with allowing clinicians, technicians and staff to be efficient when entering new patients. In the middle tab I choose which subset of the required and active fields appear in the main view when adding a new patient, and which are accessible only via the Advanced View.
Video 7: Customization Fields SetUp (click on image to play video)
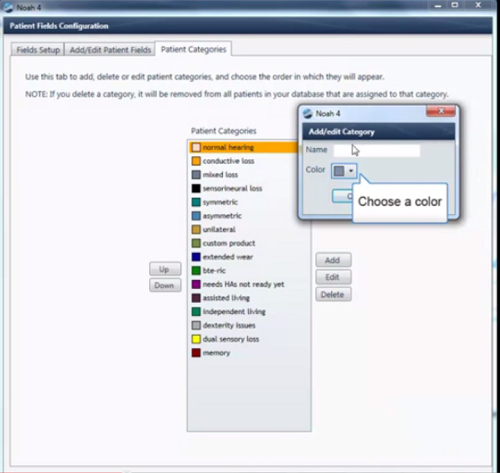
The last tab in the Patient Fields Configuration is called Patient Categories. New to Noah System 4, users have been surprised to see how this function can be used for marketing, patient management, and more. When I set up my Noah System 4 database I created the following categories (Figure 9):
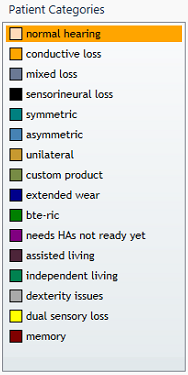
Figure 9. Example of patient categories.
When categories are assigned to a patient, they show up in the patient information summary on the bottom right of the main screen (Figure 10).
Figure 10. Patient categories assigned to the patient record.
I can glance at this area and know immediately whether the selected patient had hearing loss and what type, if it is symmetrical, whether he/she is a hearing aid wearer or should be, whether he/she is living independently, and whether there are any other key issues such as dexterity, vision or cognition problems. This particular category set works for me, but another clinician might choose entirely different categories. Examples might include the name of a hearing aid manufacturer, neighborhood or retirement community, the primary clinic at which a patient is seen, the child’s school district, the primary audiologist, whether the patient is a diehard iPhone user and so on. You can tell that this section can be made to fit your unique clinical needs.
Additionally, the advanced search function can be used to search by category. So, if I was interested in finding all patients with significant dexterity issues in order to alert them to the availability of a new device that offers a phenomenal everlasting battery, I could do so.
View Video 8 to see how to add a patient category. Later in this article we will review the advanced search functionality.
Video 8: Customization Categories (click on image to play video)
Printed reports may be generated from Noah System 4. These reports come with default setup but may be customized to include your practice information, digital signatures and more. You should note that separate customization may be needed to generate a customized report from within a manufacturer module. The following video will demonstrate generating Noah System 4 reports.
Video 9: Generating Reports (click on image to play video)
Note that the audiogram report generated from the Noah 4 Audiogram module, or from the main window, is designed to be simple, effective and to meet the needs of as many end users as possible. If you have more specific needs that are not met by this report structure you may find that using other measurement or management systems is your best course of action. As stated on the HIMSA website, Noah System 4 is a common database, and “the real power of Noah is attained by adding more sophisticated fitting, measurement and office management tools provided by licensed HIMSA member companies.”
While most of us are using Noah-compatible equipment, there are some who are not, and need to manually enter the audiogram. Have you thought about whether your audiometer or other measurement equipment is Noah-compatible? Perhaps there is an opportunity for you to improve efficiency in your office by taking advantage of Noah compatibility. Click here for a list of Noah-compatible equipment.
Powerful and Customizable Search Functionality
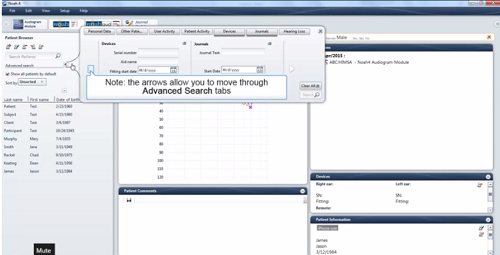
The ability to search and export subsets of your patient database is a feature that is under-appreciated by most offices. With Noah System 4 came the release of advanced search. Now you can search not only by a field, but also by date ranges, audiometric threshold ranges, categories, zip codes, devices and more. In order to have a successful search, it is a prerequisite that the information is entered into Noah System 4 along the way.
For example, if you want to be able to sort by patients with dexterity issues, you could create a category for this problem and systematically assign the category as records are created, or as you learn of your patients’ challenges. When it comes time to let them know of a device that would offer ease of use, you would simply apply an advanced search under the category of dexterity issues and export the demographic information for use in a mailing or other patient outreach activities.
Another example might include patients who have not had a hearing evaluation in the past two years. In this case you would go to Advanced Search, select the Patient Activity Tab, from the drop down select Last audiogram prior to, choose a date two years ago, and click Search. In Video 10 you will see several examples of the advanced search function. Play around with this so that you will be able to optimize its use for your clinic.
Video 10: Advanced Search (click on image to play video)
Let’s look at how to export these patients for use in marketing or follow-up care.
Video 11: Advanced Search and Export to Excel (click on image to play video)
More than One Fitting Room or Office Location?
Are you one of the many clinics with more than one fitting room or location with a separate Noah System 4 installation on each computer? You are not alone. You can use the information in this section to network your Noah System 4 in your office and even across different offices in several locations. You will be able to review the most recent hearing aid settings or measurement data no matter which fitting room you choose to use or office location your patient selects for convenient service.
Networking Multiple Rooms at One Location
In a single location setting, only one Noah end-user license is required. This is great news for those of us with several fitting or testing rooms at a given clinic site. Let’s go through an example of a clinic with three fitting rooms, each with separate Noah System 4 databases. We will go through the process of (a) backing up the data in each database, and exporting all records for import to the centralized database; (b) deciding on our server computer; (c) networking each computer to point to the server; and (d) merging the separate databases to the server so that all patient records and data from these three computers are contained in the centralized office database. Depending on your confidence in managing this process, you may decide it is a good idea to enroll some technical support from your Noah support team at a Noah distributor company before getting started.
Backing up each Noah System 4 installation.
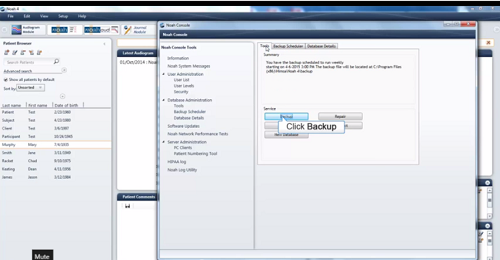
- From the main toolbar in Noah System 4, select Setup, then Administration, then Database Backup.
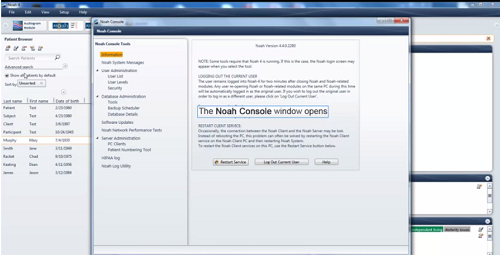
- In the Noah Console window that opens, take a moment to click on the middle tab, “Backup Scheduler” and note the location for backups.
- Go to the first tab, “Tools” and click Backup.
- Find the backup location on your PC and confirm the backup occurred.
- Do this for all three Noah System 4 computers.
- View Video 12 for these steps.
Video 12: Create Noah Backup and Verify (click on image to play video)
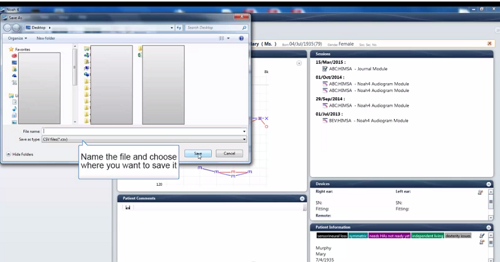
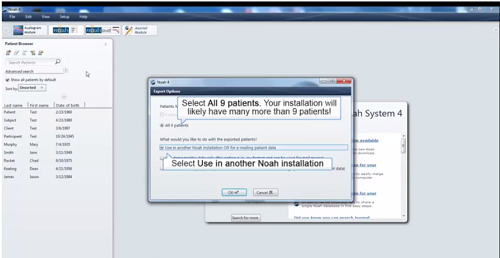
Exporting all records for import to the centralized database. From the main toolbar in Noah System 4, select File, then Export Patients.
- In the Export Options window that opens, select “All # Patients” and “Use in another Noah Installation.”
- Click Ok.
- Choose a location on your computer to which you can export the NHAX file.
- Click Save. Press Ok when Noah System 4 lets you know the export was successful.
- Repeat for the other computers that need to be centralized to the networked database.
- View Video 13 for these steps.
Video 13: Export Noah Patients for Merge to main database (click on image to play video)
Deciding on the server computer.
- Choose which computer you would like to have as your server.
- Open up Noah System 4 on that computer.
- From the main toolbar in Noah System 4, select File, then Noah Console, then Server Administration.
- Take note of the name of the computer, and the IP Address. Write it down or remember for later.
- View Video 14 for these steps.
Video 14: Figure out Noah Server Computer Name (click on image to play video)
Networking each computer to this server.
- Go to the first fitting room you wish to network.
- Open up Noah System 4 on that computer.
- From the main toolbar in Noah System 4, select Setup, then Administration, Noah Server Setup, then Server Profiles.
- Click the “New” button.
- A window opens up where you can name your database, e.g., Main Server.
- Select Browse, and then Refresh.
- Select the computer name identified above.
- Click OK.
- When you open up Noah System 4, this server will be an option as you are logging into the system.
Merging separate databases to the server.
- Open up Noah System 4 on any of the networked computers and log into the centralized database.
- From the main toolbar in Noah System 4, select File, Import Patients
- Select the file you exported above.
- Click Open.
- The import will begin, and you will be faced with managing any import conflicts that occur. What’s an import conflict? If you saw the same patient in several fitting rooms over the years, (s)he is going to have a Noah file in each computer and these files will need to be merged.
- You may merge each one, one-by-one to ensure you review each conflict. Alternatively, you may click on merge all.
- When complete, click Finish.
- Repeat this for the other PC(s).
Some excellent resources on this topic are available on the HIMSA website: Networking Noah System 4 and HIMSA News: January, February and March 2015.
Networking Multiple Physical Locations (wide area network/WAN support)
There are some limits to sharing a common Noah System 4 database. Firstly, normal activity use is supported for up to 40 client computers or up to seven remote offices (whichever is reached first). Beyond this level a company should investigate the use of a Noah-compatible business system. A list of these systems is maintained by HIMSA.
Secondly, connectivity speed can be a problem. The connection between offices needs to be at least 2Mbps both ways. Check with your Internet service provider or your IT support folks to check whether your current network can support this connectivity speed requirement. This connection also needs to be reliable.
When exchanging data across a wide area network (the term for a network connection across locations) there is a much greater risk for data theft. This, of course, brings up HIPAA concerns, and a need to protect our patients’ data. Therefore, steps must be taken to protect the data while in transfer. Typically this involves the use of a virtual private network connection (VPN).
Finally, note that your clinic generally needs a unique Noah System 4 license for the central office and each remote office.
Read through the following HIMSA requirements before starting the WAN process, and consider enlisting the help of your IT support personnel or your Noah distributor company technical support personnel. If you decide to employ Noah System 4 over multiple locations, why not add an additional category or categories so that each patient is assigned to the primary clinic at which he is seen?
Secure Patient Data, Protect your Practice
I will first address some of the advantages of individual user log-ins, and some of the risks of not enabling log-ins as a security feature. Even if you are entering limited demographic data into Noah System 4 and don’t intend to use a wide area network or export demographic data for patient outreach, you are still dealing with a database that includes protected health information. Under the United States Health Insurance Portability and Accountability Act (HIPAA) information such as patient names, address, date of birth, telephone numbers, email addresses, medical record numbers, patient numbers or social security numbers, device serial numbers, photos or other identifying information is considered protected health information (PHI).
Advantages include allowing you to see, at a glance, which provider has performed each service in the Sessions list. If you are using the default ABC log in you probably see something like Figure 11 in an average patient’s session list.
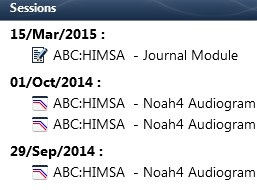
Figure 11. Example of Sessions list after a login.
Without checking the physical chart or your EMR system you cannot tell which provider completed the audiograms nor the journal entries.
Requiring a login also allows you to protect your database. Rarely does the average clinician think about the value of the data in the system, but setting up individual logins and defining user levels and associated privileges goes a long way to protecting this asset. Figure 12 shows some of the tasks a user could perform in the Noah System 4 database.
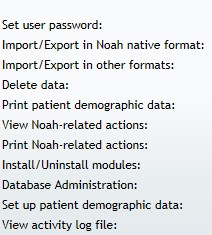
Figure 12. Example user functions in Noah 4.
Obviously the owner or other administrator should be able to perform all of these tasks, but do you want a volunteer, receptionist, or a new clinician to be able to delete data, export your patient records, or install/uninstall modules? By assigning user levels, certain individuals may be given administrator status, while others have a more restricted set of privileges.
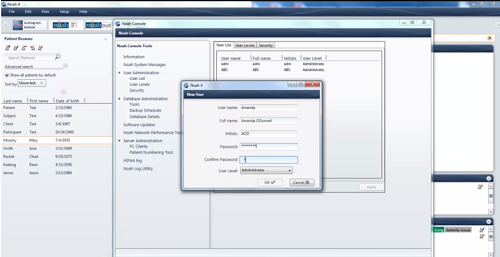
In Video 15, you will see the User Administration area of Noah Console. We will set up an imaginary clinic user list including myself (Amanda), and two staff members – patient care coordinator (Mary) and an audiologist (Dave). I will set up the security tab so that password controls are enabled.
Video 15: User Levels and Security (click on image to play video)
More than Just the Hearing Aid Fitting – Other Native Modules
Within Noah System 4 we have access to several modules developed by HIMSA. The newest modules are listed on the HIMSA website.
At the time of this writing, modules include the Noah 4 Audiogram Module (released September 2014), the Noah 4 Journal Module (released March 2015), the Noah Questionnaire Module, and the Noahfit Module.
If you have the following thumbnail in your module bar (Figure 13), you have the most recent audiogram module.

Figure 13. Audiogram Module icon.
Likewise, the most recent Journal module is represented by the thumbnail shown in Figure 14. Downloads of the updated modules are available from the “Download” section of the HIMSA website.

Figure 14. Journal Module icon.
Conclusion
While not all of these topics apply to all users, some may have sparked your interest in making your usage of Noah more efficient or productive. Bookmark www.himsa.com to stay up-to-date with the main HIMSA website where all news and announcements are listed.
Sign up to receive HIMSA newsletters directly. These newsletters are available to subscribers in English, French, German and Spanish.
HIMSA stores a host of support articles and tutorial videos in The Learning Center, located in the Support section of the website, in the Noah 4 Knowledgebase.
If you think you would like to influence the future of Noah, consider joining the Noah User Group (NUG). This is a global club with hundreds of members. NUG members have a chance to participate in surveys, field test new software or features before they are released, and have an impact on the future of the Noah platform. Join NUG here.
Cite this Content as:
O'Donnell, A. (2015, June). The Power of Noah System 4: making the most of your Noah database. AudiologyOnline, Article 14137. Retrieved from https://www.audiologyonline.com.

