Question
How does the Lantos 3D Scanning System work?
Answer
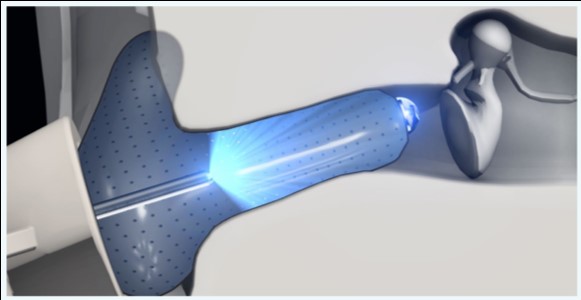
If you're not familiar with Lantos, we make the only FDA-cleared 3D digital ear scanner. The system uses a membrane (Figure 1) that is central to the experiments we will discuss today. After loading the membrane and the solution into the scanner, you place the membrane and the camera down the ear canal. There's a clear window at the end of the membrane so you can see exactly where you're going when maneuvering the camera. On the screen, there is a yellow circle that allows you to align the annulus of the tympanic membrane (TM) to that circle, sort of like a distance gauge to indicate when you're about four to five millimeters away from the TM.

Figure 1. Membrane and camera in the ear canal.
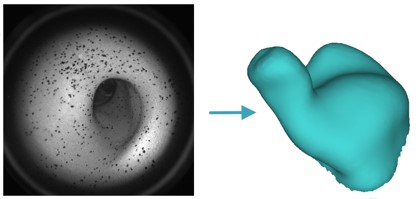
Once you've reached the correct depth with the camera, the membrane gently inflates with a red water-based solution, and then the camera retracts. The camera emits a blue light that makes the inside of the membrane glow yellow. It glows yellow because the membrane is fluorescent, and the combination of that yellow light coming back to the camera and the red solution the light passes through lets the scanner measure the distance from the camera tip to the inside surface of the membrane that's right up next to the surface of the ear. As you scan, you move the camera first around the concha, and then down the ear canal. The software then converts the 2D images to 3D and stitches them together, by a process similar to taking a panoramic photo but in 3D (Figure 2).

Figure 2. A collection of images like the one on the left are converted from 2D to 3D and stitched together into the complete scan.
The scanning process is shown in the following video; the person speaking is Erin Henry, our Director of Training.
This Ask the Expert is an excerpt from The Movin' Groovin' Outer Ear. Learn more on the Lantos Technologies Partner Page on AudiologyOnline or visit www.lantostechnologies.com

